If you have a spare plastic laundry basket/hamper sitting around somewhere, why not put it to good use and grow strawberries in it? Here’s one way you can do that, though of course many variations are possible.
You’ll need –
- laundry basket/hamper
- soil
- plastic trash bag, burlap, or weed mat
- strawberry starts (look for small ones without a lot of greenery yet, or bare root)
- other plants for the top (optional; you can also just plant more strawberries there)
- scissors
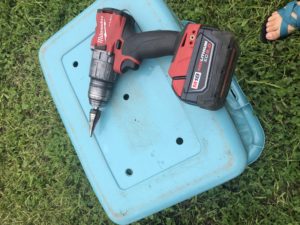
The first step is to add some drainage holes to the bottom of your basket. We used a drill, but if you don’t have one, you could cut some slits with a razor blade, scissors, etc.
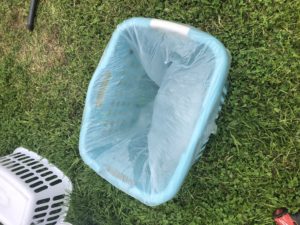
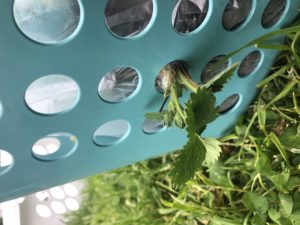
Next, position your plastic trash bag inside to keep the soil from falling out of the holes in the basket. (Alternately, you could use burlap or weed mat, in which case you’d just line the sides, no need to line the bottom.) We cut holes in the bottom of the plastic bag that lined up with the holes drilled in the bottom of the basket.
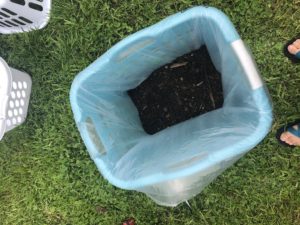
Then you’ll need to add about six inches of soil to the bottom of the basket.
Now you’re ready to place the first round of strawberries. You can place them about six inches apart around the perimeter at the soil level. Just poke a hole into your lining material (plastic/burlap/weed mat) at each spot where you’re going to place a strawberry plant, and carefully place the plant with roots inside and foliage outside in each opening.
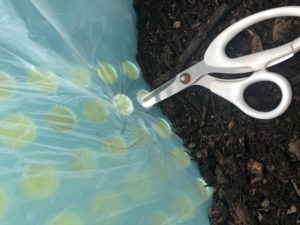
Add another 3-4″ of soil and repeat the process of planting, staggering this row of plants from the first row. Continue until you near the top of the planter. You can finish the project by planting more strawberries on top, or another crop like lettuce, kale, etc. Trim the liner material an inch or so above the soil line.
A note about watering – especially if you’re using a tall laundry basket/hamper, you might want to consider including a way for water to reach the center/bottom of the planter better. One way to do this would be to use a 2 liter soda bottle, cut off the bottom, take off the lid, poke several holes in the sides, and sink it upside-down into the top of the planter until the cut-off base sits right above the soil line. When it’s time to water, add water into this reservoir to encourage it to make its way all the way down to the center and bottom of the planter, ensuring that water reaches the roots of the lower plants, not just those on top. (We didn’t have any large soda bottles so we used the base of a plastic mango container from Costco… something longer and skinnier definitely would have worked better though.) You could also accomplish this by using a length of PVC pipe with holes drilled into it.
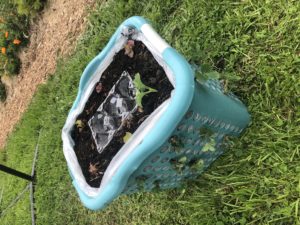
Here’s the finished planter, with about two dozen strawberry plants around the sides, and lettuce and kale on top.
If you attempt this project, please let us know how it goes!